Your Cart (0)

.png)

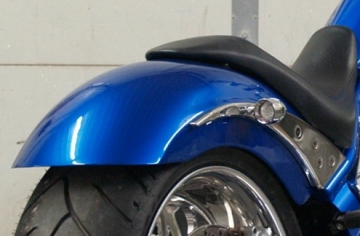
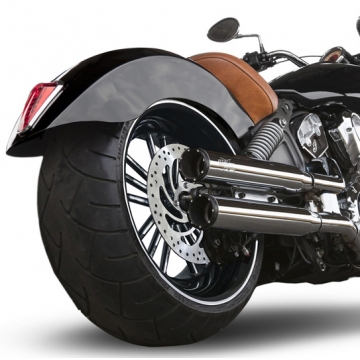
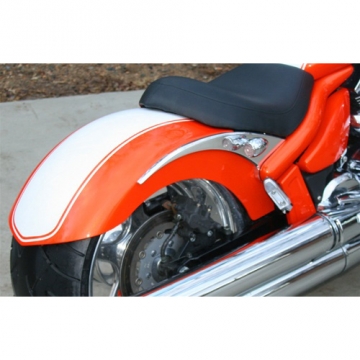
Thumbnail Filmstrip of Rear Fender, Swingarm, Exhaust Bracket and Seat Kit for Big Wheel 240 Fat Tires - VTX1800/1300 Images
Designed to fit a 240 tire typically mounted to an 18" x 8.5" wheel (Sold Separately).
Includes:
- Rear Fender Pointed or Round
- Exhaust Bracket
- Re-Man Swing Arm
- Seat choice solo or 1.5 seat
Fender Features:
- Sumo-X fenders install in about an hour and will give your VTX a lower, sleeker, chopper look, unlike other fender kits that don't change the profile of the bike at all.
- Finished in a ready-to-paint Gelcoat
- Our kit drops your rear fender height about 3 to 4 inches.
- This fender design actually lowers the bike center of gravity, making for a more stable ride.
- Designed for 240 or 250 tires.
- Passengers are no problem with the thickness of this construction.
- Excellent fitment.
Exhaust Bracket:
- Honda VTX 1300/1800 Exhaust bracket.
- Designed for 240 tire bikes with STOCK exhaust OR aftermarket exhaust that maintains the stock mounting bracket.
Re-Man Swing Arm:
- This price includes a $250 refundable core charge. You must send in your old swing arm.
- Modified stock Honda swing arm made to accept a 240 rear tire on an 8.5 inch wheel.
- Finished in black powdercoat and clear power-coated for extra protection and high gloss.
Optional License Plate Bracket:
- 6061 billet aluminum components assembled with chrome grade 8 hardware.
- This side mount plate bracket will fit all Honda VTX's.
- Just back out the stock final drive studs about 6 turns and install.
Seat Options:
Sumo-X Solo Seat for Honda VTX1800

Sumo-X 1.5 Seat for Honda VTX1800

Sumo-X Solo Seat for Honda VTX1300

Sumo-X 1.5 Seat for Honda VTX1300

Seat Features:
- Our Solo Seat also accepts our "Booty Pad" Passenger Pad.
- Quality construction with classic chopper looks.
- Marine grade vinyl covering.
- ABS plastic seat base with custom molded foam.
- Super convenient suction cup mounting.
- This seat combined with our Sumo-X fender lowers the seat height about 2 to 3 inches.
- Will not fit bikes with stock Honda fender.
Fender Installation:
Before you begin, make sure your motorcycle is securely blocked and strapped for safety reasons. The frame should be about 6.5" from the work surface to insure an easy installation.
Step 1. With necessary factory components removed, mark and cut the frame just behind the shock mounting hole about 1" from the center of the hole.
Use the template provided.

Step 2. Slide fender and strut assembly into place as shown in photo 2.

Step 3. Install Shock mounting bolt through large hole in strut into the shock bolt hole in the frame and finger tighten.
Adjust rear of fender up or down until the bottom of the struts appears parallel to the factory side covers and the fender is centered to the tire. Check the seat and side cover fitment at this point. Also check fender and tire clearance, loosen shock studs and re tighten to hold the fender in place and re-adjust if nessicary. Use a punch (preferably a transfer punch) to mark the front hole location in the frame. See photo 3.

Remove fender assembly and drill a 5/16" hole in both sides of the frame. Reinstall fender assembly and install the front and shock mounting bolts through the frame, install washers and nuts. Using thread sealant is recommended. (This can also be done with the fender on if extreme car is taken.)
Step 4. Install shock bolt bezel as shown in photo 4. The bezel goes over the top of the shock stud!

Step 5. Tighten both the shock mounting bolt and the front strut bolt. Install shocks per shock instructions.
Step 6. 1300 Models will require that you cut some of the foot peg bracket for fender clearance.
Cut only the sections shown in photos 5 and 6.
Right Passenger Peg Bracket cut

Left Passenger peg cut.

Step 7. Install seat and side covers, Double-check all fasteners for proper torque per the Honda service manual.
Tire Information

Best Sellers

Connect with our Team
Questions?
Call or WhatsApp: 786-242-5400 📞
